If you have an outboard engine, especially a smaller, four stroke dinghy engine for your tender, you have no doubt met the reality of ethanol gasoline head on. It is amazing that we have been forced to use gasoline with 10-percent ethanol. Don’t get me started on legislation to increase this to even greater percentages.
In any case, the inevitable issue of having water in your fuel and therefore your outboard’s fuel system will quickly render your outboard useless. Let gas sit in the carburetor is a guarantee that you will have issues. For that reason it is best to run your outboard until it runs out of fuel, or to drain your carburetor bowl if you don’t plan to use your outboard for even a couple of days.
My friend, Howard Brooks, has a 2006 Mercury 6hp four stroke outboard that is essentially a new engine with low hours, but it hasn’t been used in a couple of years. Frustrated with the ethanol problem, he bought an electric Torqeedo for the short dinghy trips he and his wife do on local cruises. The slow speed and relatively short range of the Torqeedo is fine for their local needs, so the Mercury sat in the garage.
But when we decided to get it running again, we enlisted the help of Will Heyer, a jack-of-all-trades when it comes to boats. I first met Will years ago when he was with Vetus, and he came to replace Growler’s bow thruster motor’s brushes when they prematurely coated the space under the master berth with black dust. He had done this more than once it seemed.
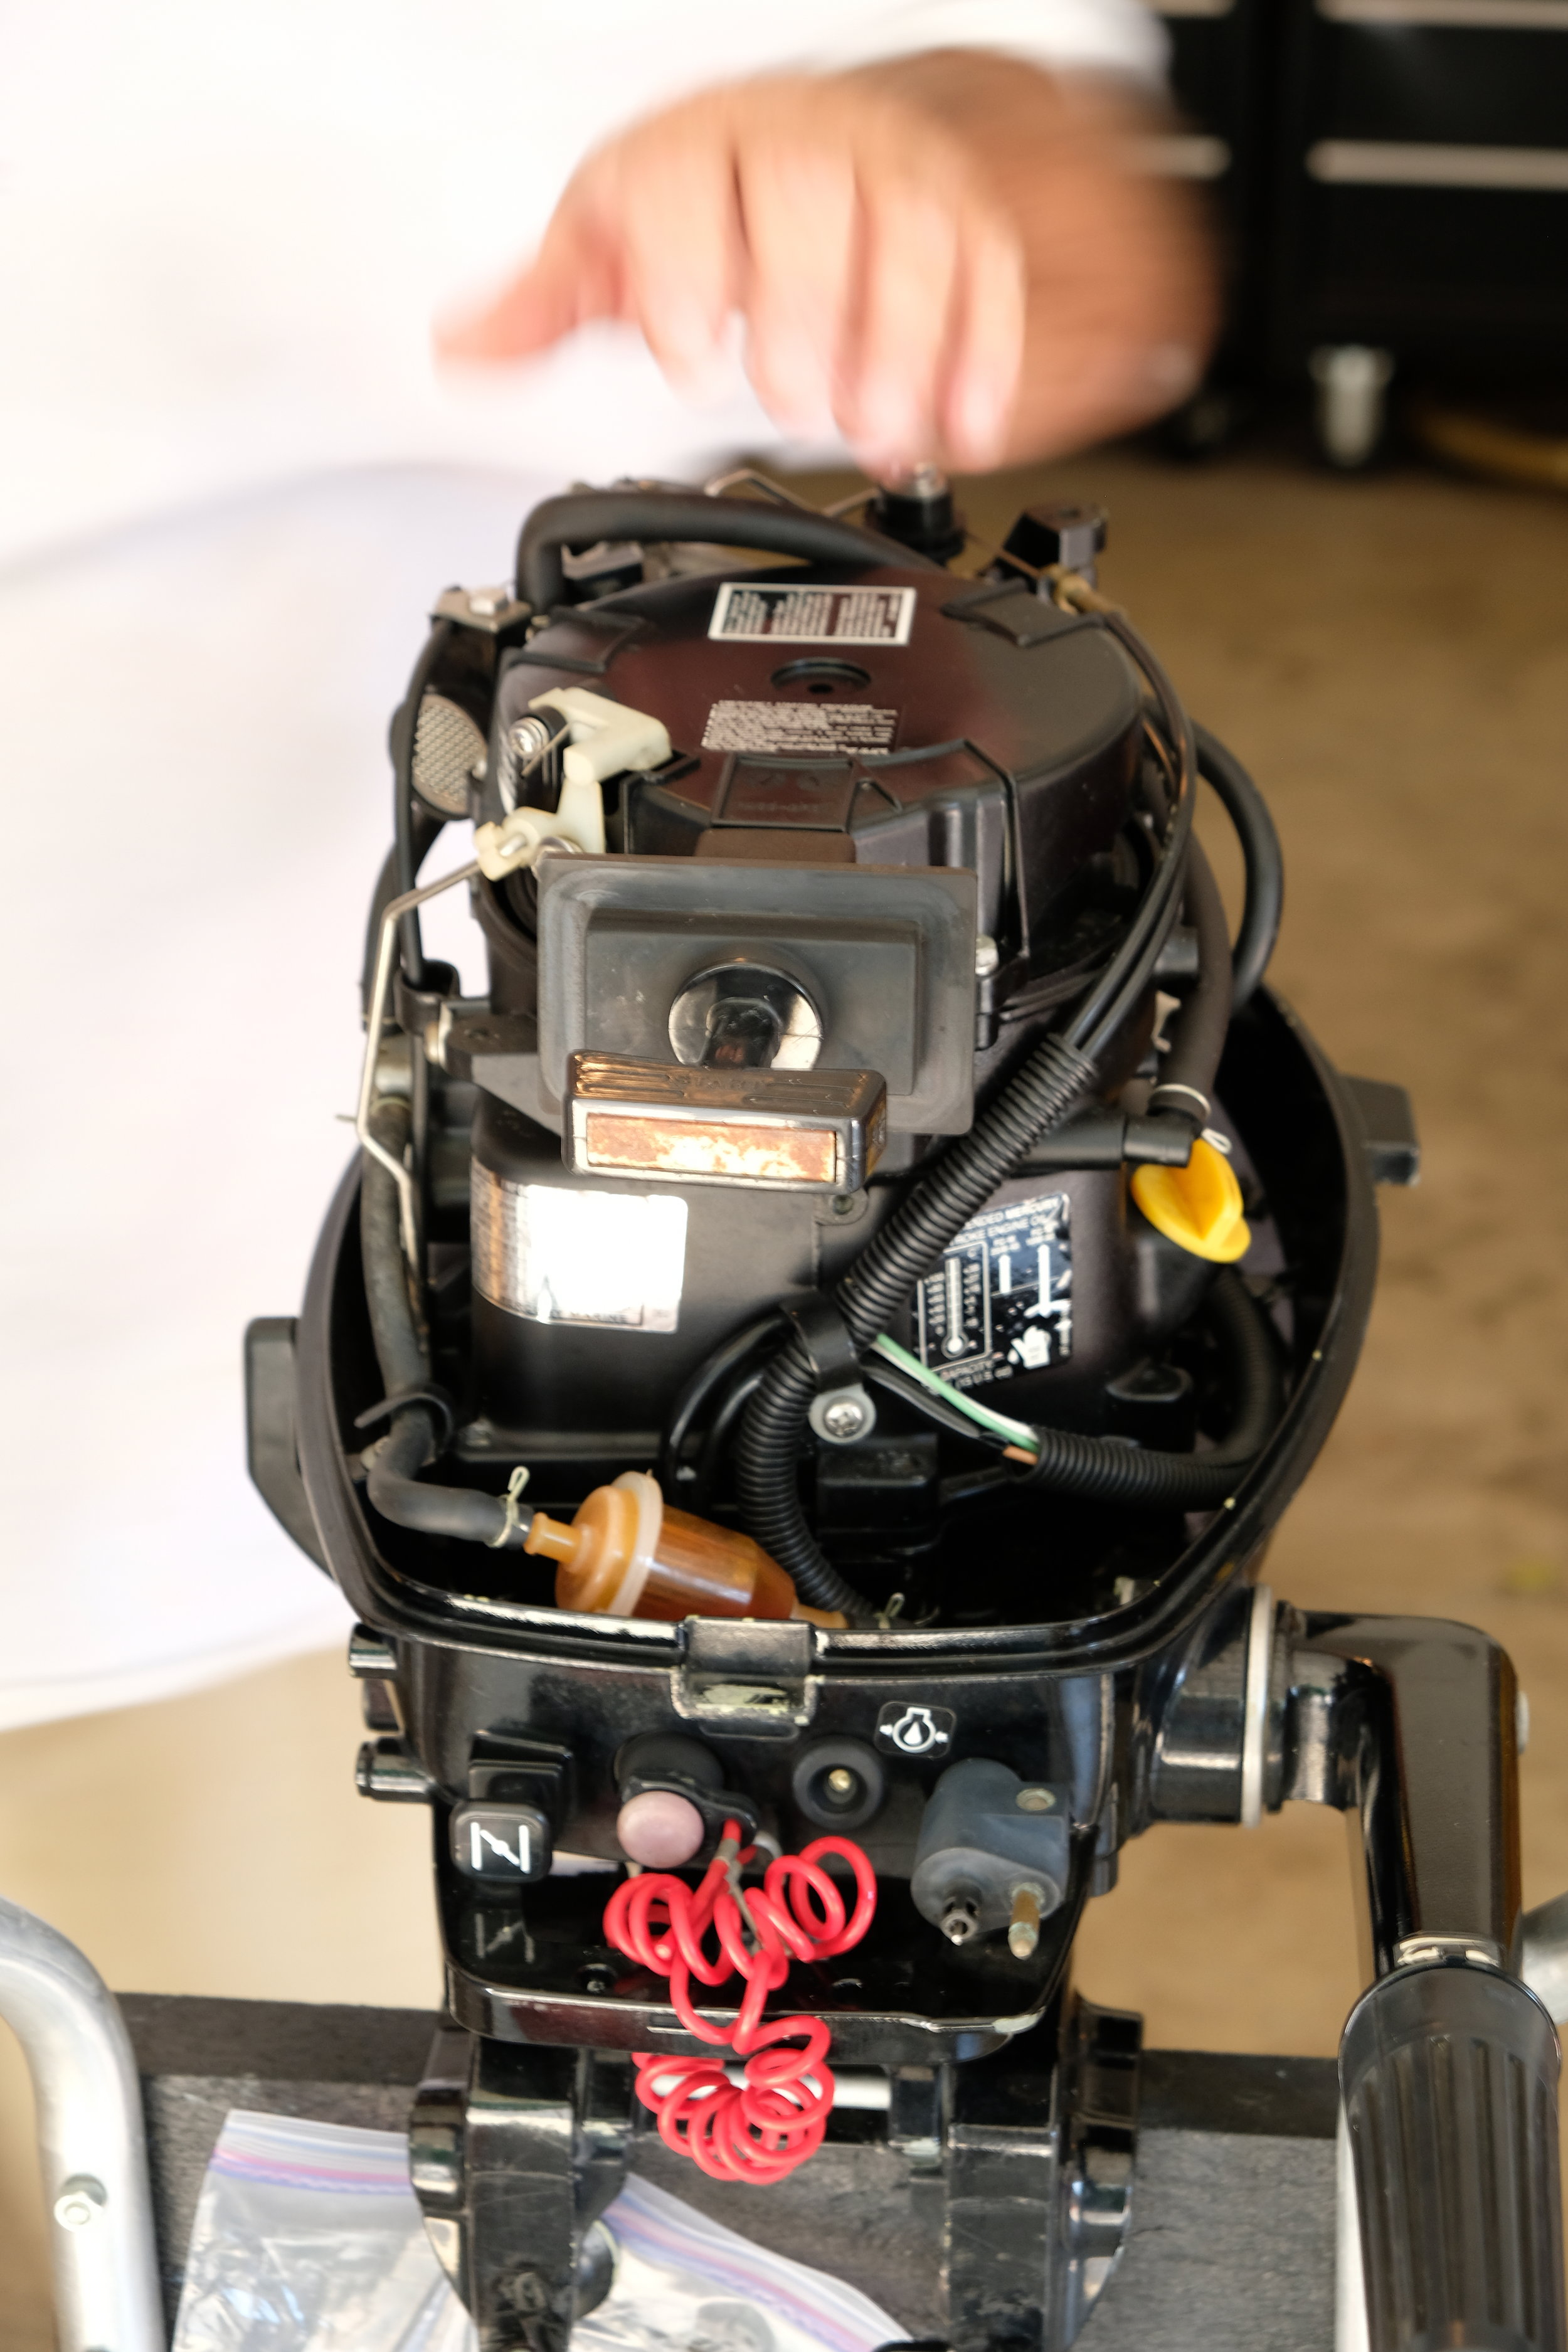
Will is somewhat of a legend when it comes to small engines, and he agreed to come over and help us figure out the ailments of this outboard, although he pretty much knew what was going on. Like several lines of outboards, this engine is actually made by Tohatsu, but no matter the labeling on the outboard, four strokes are all essentially the same. So what he did on this engine to get it running will be very close if not exactly the same on your four stroke outboard.
Will commented at the outset that we don’t need to carry a complete rebuild kit as a spare, as the issues do not require much more than a carburetor bowl gasket, which should be replaced when you take it apart. In the Tohatsu manual, it is referred to as a Float Chamber O-Ring.

First, he pulled the fuel connector off the fuel hose and inspected the inside of the hose. Despite the lack of use, we were surprised to find the inner lining of the fuel hose was breaking down, crumbling inside the fuel hose. The fuel line would need to be replaced.
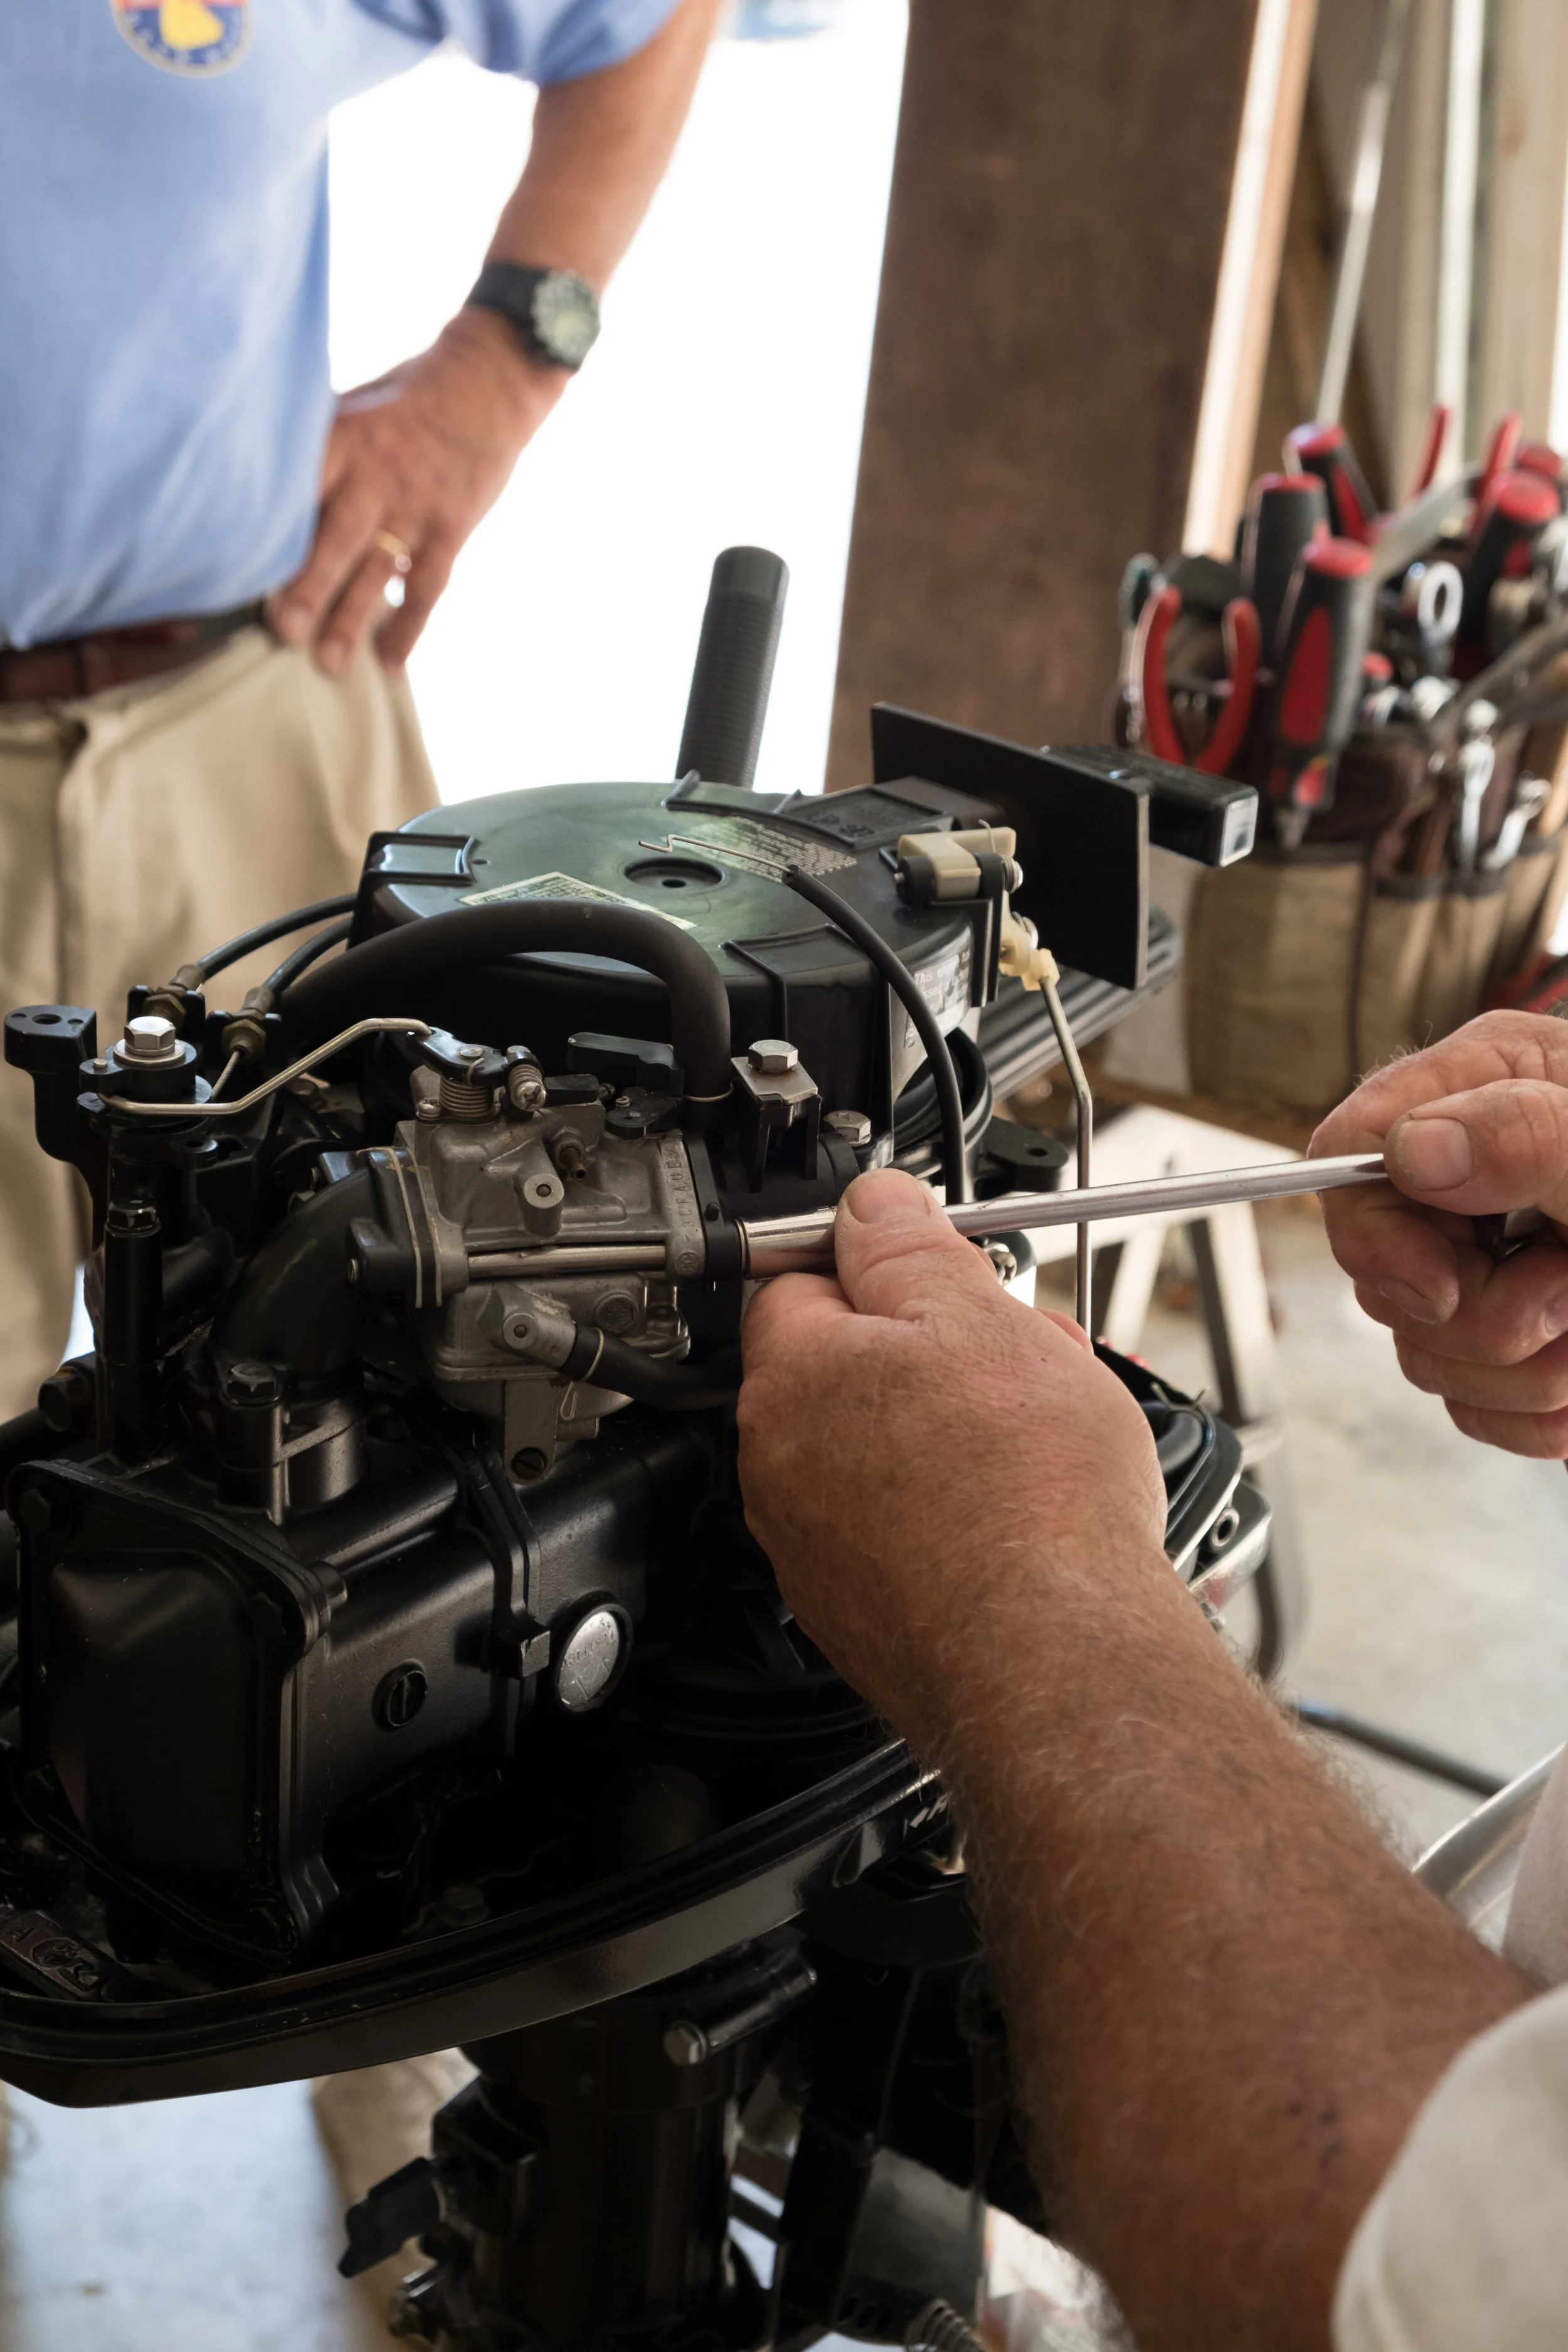
Engine cover off, he then disconnected the choke linkage, commenting that we should lube the movement of the cable when we put it back together. Then he removed the fuel line, breather hose, throttle linkage, and unbolted the carburetor.
He showed us the drain screw that should be remove to drain the gas sitting in the carburetor bowl (aka, float chamber) when the outboard is not going to be used for a period of time, even several days. If it will be unused for a long period of time, he suggested filling the bowl with WD-40 for storage.
Upside down, the float and main jet are clearly dirty. Not a pretty sight.
After removing the float chamber on the bottom of the carburetor, he used a wide blade screwdriver to try to unscrew the main jet. (This jet is easily damaged if the screwdriver blade is not wide enough to engage both side of the slotted jet.)
He was unable to unscrew the jet, as it was frozen in the carburetor body, a case of dissimilar metals. The main jet lies at the bottom of the carburetor float bowl, so if any water sits in the bowl the jet quickly corrodes and fuses to the metal of the carburetor body, which is obviously what happened here. Normally this is rectified using a screw extractor acid solution, so he dabbed the jet and surrounding metal with Marykate On & Off Hull & Bottom Cleaner to see if it would melt the corrosion. While it foamed up and bubbled, the main jet did not move, frozen in the carb body.
At this point, we had two options. Keep going, which will destroy the main jet to remove it, or buy a new carburetor for about $200. We decided to keep going, as this would be our plan if we were out cruising. A new main jet might be easier to find then a complete carburetor.
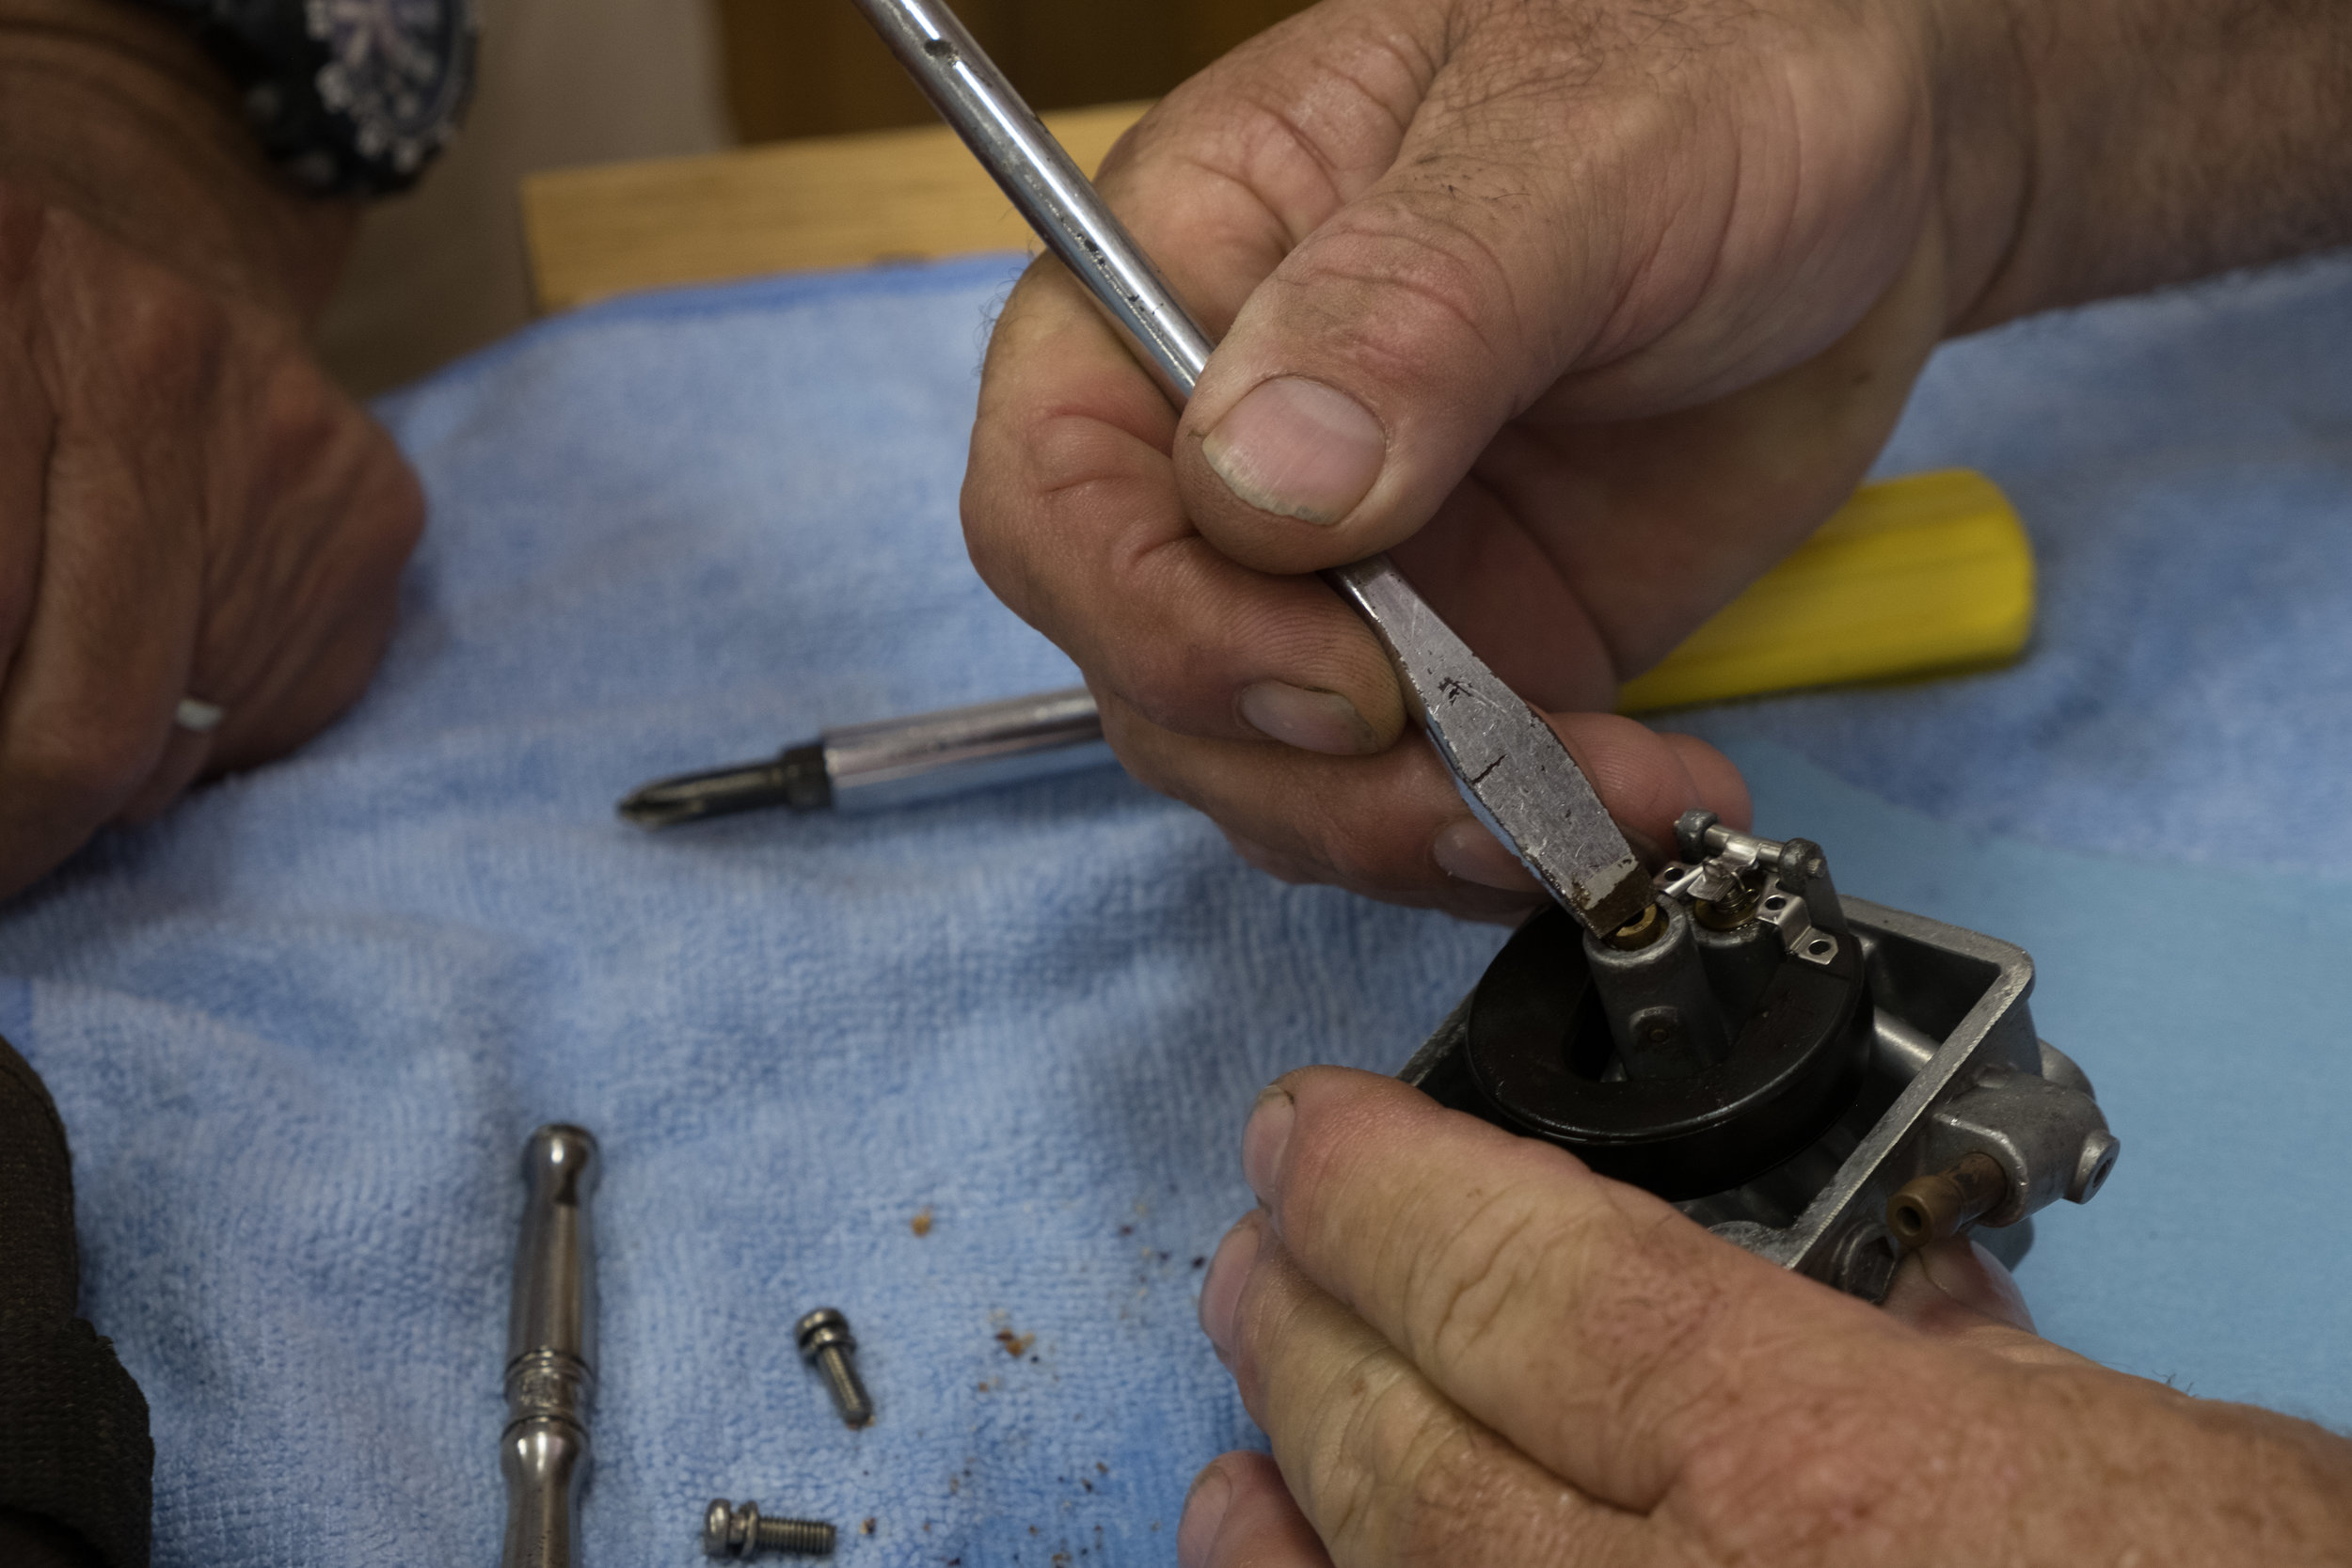
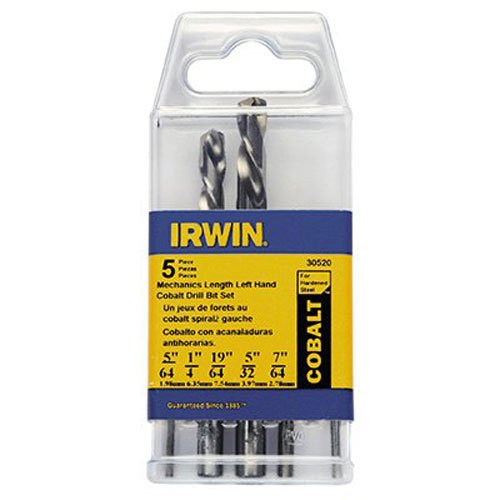
He put the carburetor upside down in a vise, and went into his tool bag for his set of left hand cobalt drill bits. I had never seen these before, but they work in the opposite direction of a normal drill bit. Ever so slowly, Will drilled into the main jet, the drill bit turning counter-clockwise as it went deeper into the soft brass of the main jet. Between the action of the acid and his drilling, the main jet broke free and unscrewed as he continued with the drilling. It finally came out, but of course was ruined.
Then he removed the main nozzle from the carb body. The nozzle vaporizes the fuel with air, and if any of the holes in the nozzle are blocked or plugged, the fuel/air mixture is wrong and the engine won’t run.
The fuel nozzle, with many tiny holes corroded over. No wonder the engine did not run.
Will cleaned the nozzle with carb cleaner, wiping off the debris that clung to the nozzle body. One can use a thin wire to poke through the plugged holes, but it needs to be the right size. With a wink and a smile, Will reached into his tool bag and pulled out his little Stahlwille jet reamer set with pin vise. This is another tool I had not seen before. No surprise, really, as Will explained few cruisers carry such tools unless they used to work on race cars way back when it was routine to hop up carburetors for the race track. Another reflection of Will’s background skills.
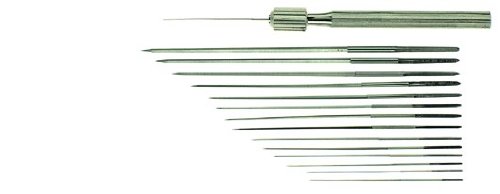
He carefully picked the right size reamer as he wanted to clean out the holes, not make them bigger. We used carb cleaner to flush out the now shiny main nozzle.
All cleaned up, holes carefully cleared without changing the size of the holes.
The float valve was dirty and not moving as it should, so he removed the float arm pin and removed the float, so he could clean the float valve. Fortunately we had access to an air compressor, so Will used compressed air, carb cleaner, and his jet reamer to blow out every orifice of the carb body. The idle circuits jet passage was especially dirty. He said that when you get into this, clean every orifice while you are at it. Putting the carb back in the vise, he then drilled a small hole in the shiny cap covering the pilot screw set, mandated by the EPA so an owner can’t adjust the idle of the engine. Will is not a keen fan of big gov stuff, and he screwed a small wood screw part way into the hole he drilled in the cap. Grabbing the head of the screw with pliers, he pulled the cap off. He then unscrewed the pilot screw, cleaned out the area with carb cleaner, and reinstalled the screw, backing it out precisely 2-⅛ turns.
As he pointed out, all transition ports and passages must be clean so the engine can move from idle through the various speed ranges. He sprayed carb cleaner all around the butterfly valve and through the many tiny holes that surround it.
We picked up again when we got the new main jet. Will ordered it from www.boats.net, a .68mm main jet that cost $10.47.
A couple of days later, Will was back in the shop with the new main jet. This time he used Ultra Tef Gel on the threads of the jet to separate it from the dissimilar metal of the carb body.
Then he replaced the bowl gasket (it was brittle), put some Super Lube on the new gasket, and put the carb back together. (He cautioned to make sure the drain plug screw is on the proper side of the bowl, or it will be hard to reach if put on wrong.)
As things came back together, he blew out the fuel lines, from the fuel tank all the way to the carburetor. He flushed the fuel lines with carb cleaner inside the outboard, as he pointed out a white powder corrosion up near the hose barb on the fuel pump.
Before reattaching the fuel line to the engine, he pumped fuel from the bulb near the tank into a jar to flush out any gunk or sediment. With a freshly cleaned carburetor and lines inside the outboard case, we did not want to reintroduce sediment or dirt back into the system.
While he was at it, Will inspected the spark plug. It was good to go.
Will puts a thin layer of Super Lube on the carburetor gasket. before putting it all back together.

All put back together, with an improvised water tank to simulate the outboard being on the back of a dinghy, Will primed the fuel to the carburetor. Then he pulled out the reattached choke assembly (we had lubricated it and the throttle cable), and the engine started up with a purr.
With the right tools and some spare parts, anyone can deal with the issues of ethanol and have a happy outboard engine always ready to serve its crew.
If you enjoyed this article, please subscribe so you won't miss anything as I keep building followingseas.media.